The Art of Smoothie Layering
The Smoothie world of contents and textures can become somewhat routine. After all, blending a banana or piece of kale has predictable outcomes. Thankfully, this training time of banana and kale is not without its benefits.
The seasoned Smoothist, over time, develops a fifth sense of understanding quantity of source fruit and vegetables with the desired outcomes of the blend.
The fifth sense is the basis, upon which the Smoothist’s blending skill-set suddenly decides to embrace creativity and experimentation. This is the moment of a Smoothist’s break out into new geometric presentations a.k.a. layering.

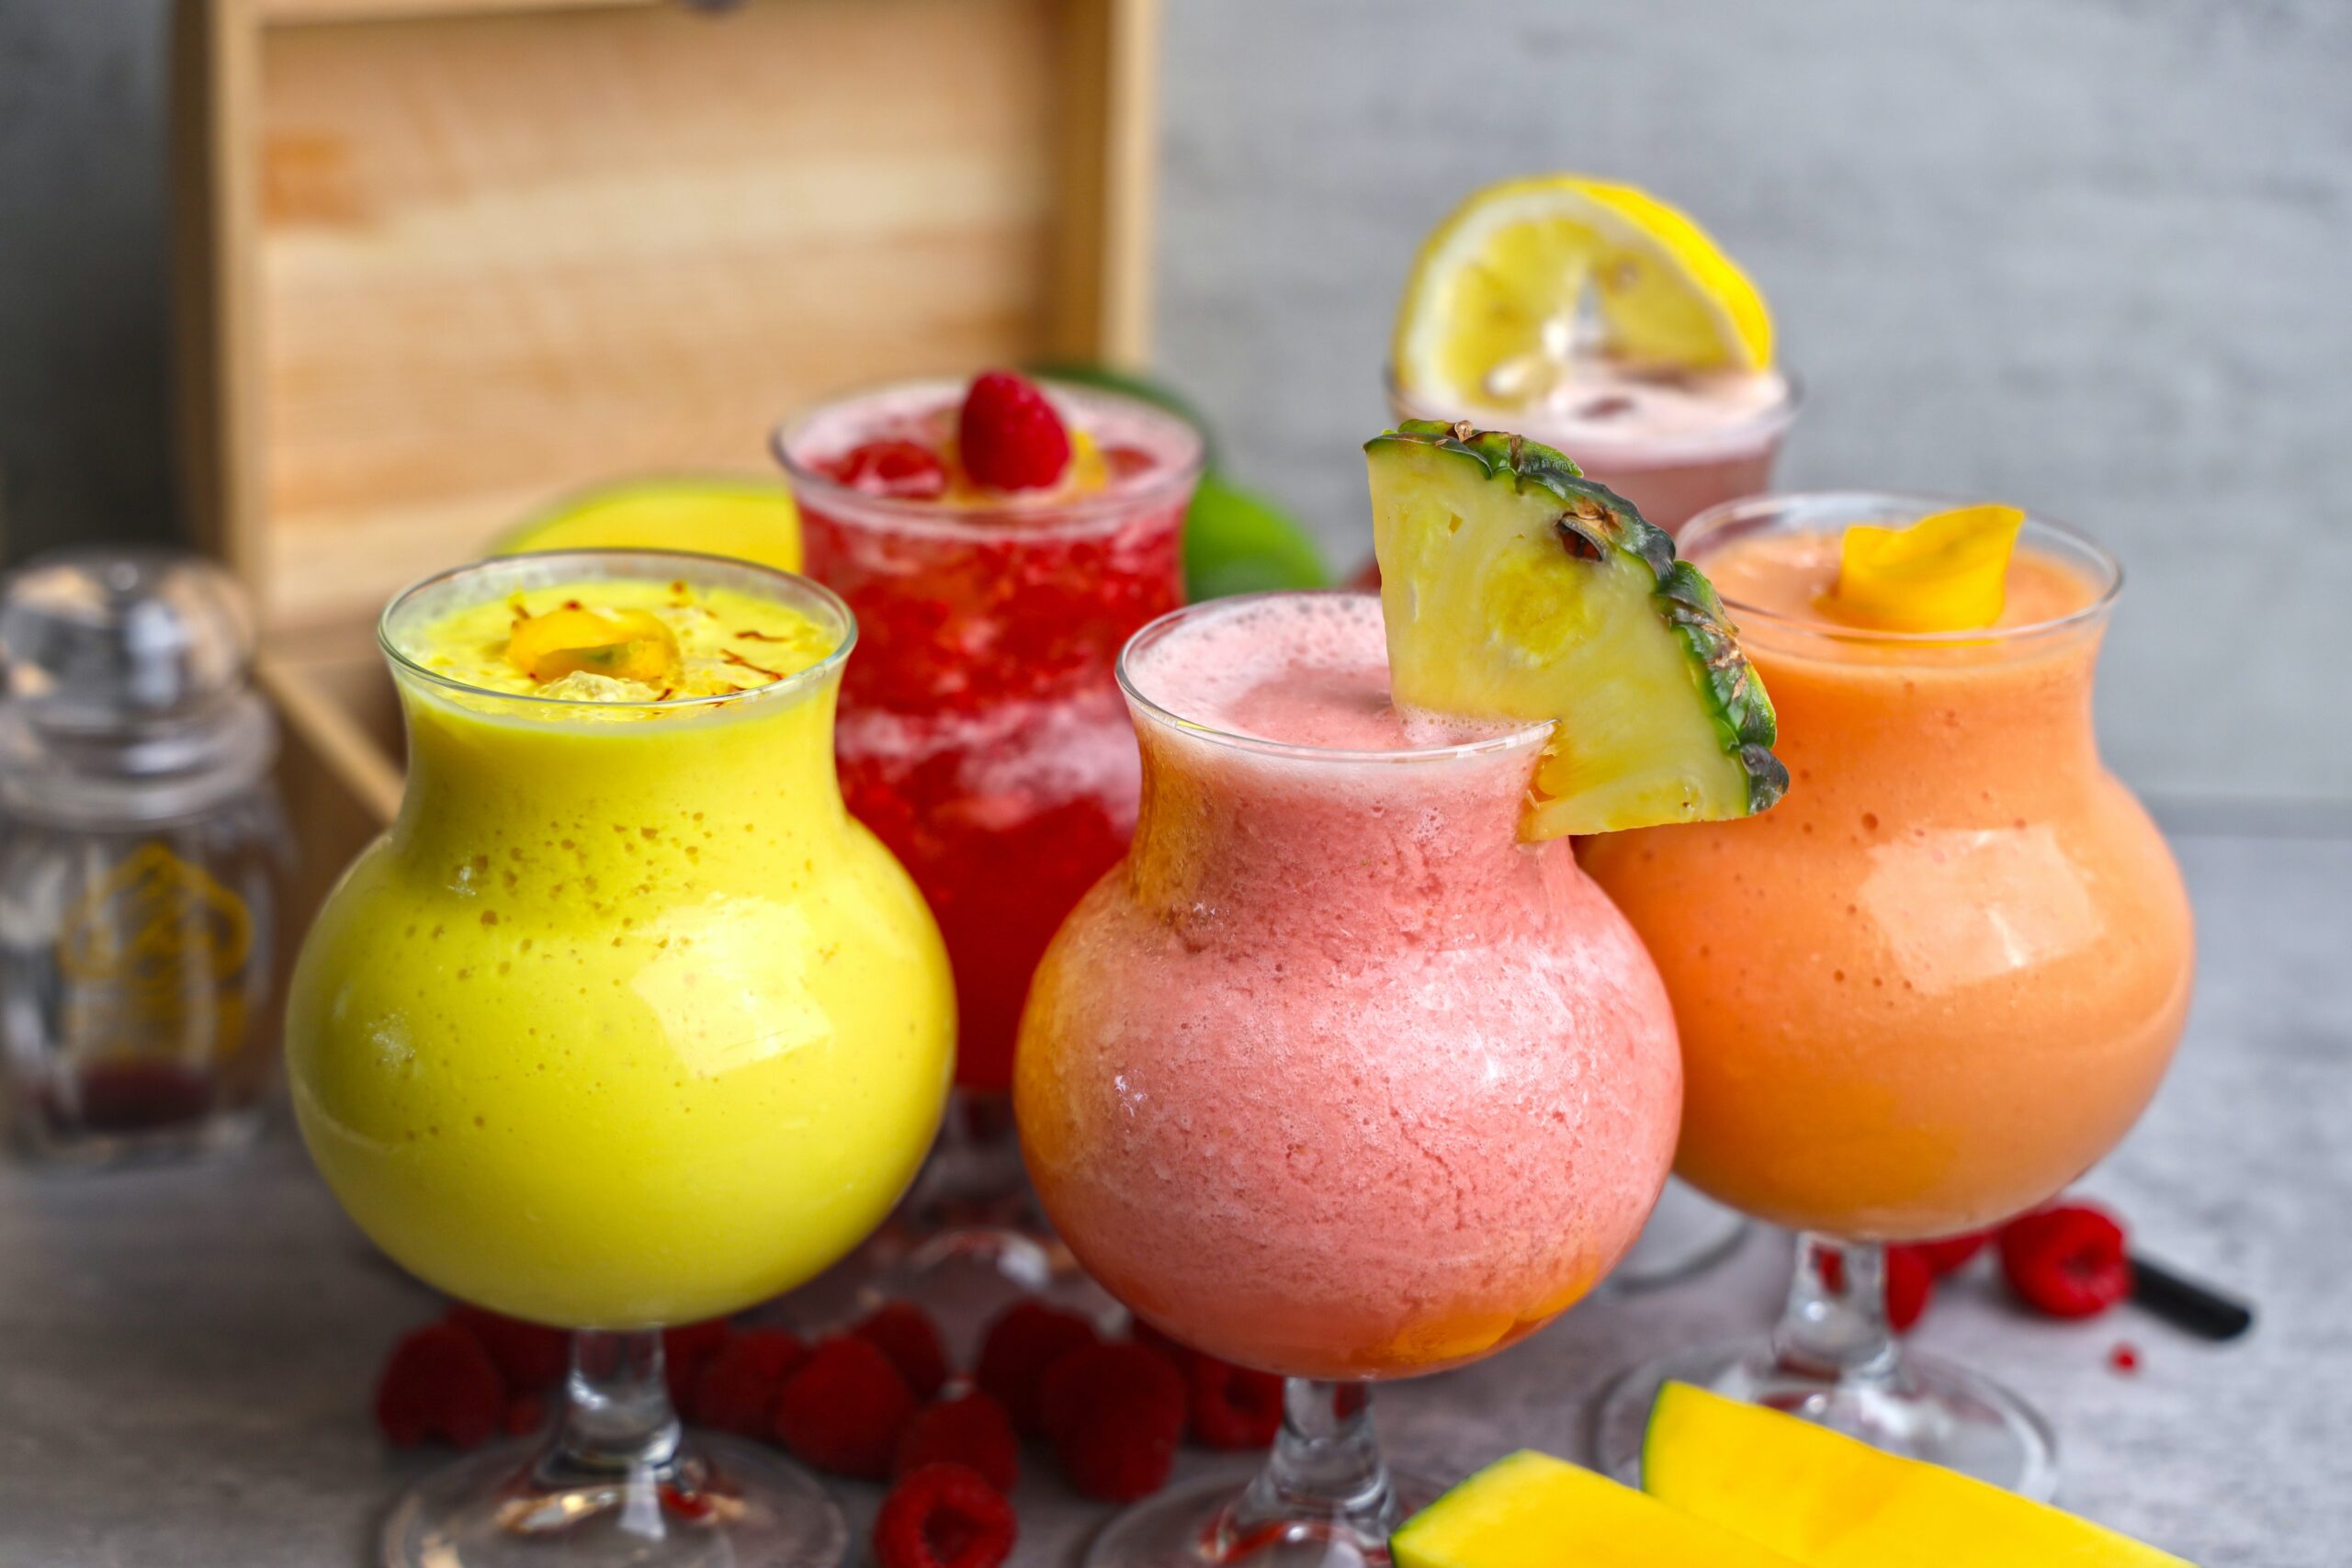
The art of layering a smoothie involves creating a visually appealing beverage with distinct layers of different colors and flavors. It’s a creative process that turns a regular smoothie into a visually stunning treat. Here are the key aspects of this art:
Planning Your Layers
- Color Contrast: Choose ingredients that have contrasting colors for visual impact. Common combinations might include green (spinach or kale), red/purple (berries), yellow (mango or pineapple), and white or beige (banana, yogurt, or almond milk).
- Flavor Combinations: Beyond color, consider how the flavors of each layer will pair together. Complementary flavors ensure that each sip is delicious.
Preparing the Smoothie
- Consistency is Key: Each layer should be thick enough to support the next. Ingredients like bananas, avocados, yogurt, or chia seeds can help thicken layers. If a layer is too runny, it might not hold and could mix with other layers.
- Blending Separately: Prepare each layer in separate blends. Clean the blender between making each layer to keep colors distinct.
- Variable Speed: Using a variable speed blender can greatly increase your success of achieving a consistency between layers. Note: always chill the blender hopper to compensate for the frictional heat created during the blending process.


Layering Technique
- Start with the Heaviest Layer: Begin with the densest or heaviest smoothie mixture at the bottom. This is often the layer with the most frozen fruit or yogurt.
- Careful Pouring: Gently pour each subsequent layer over the back of a spoon or use a small cup to minimize disruption of the layers below.
- Chill if Needed: If you find the layers are mixing too easily, you can chill each layer in the refrigerator for a short time before adding the next one.
Final Touches
- Garnishes: Top your smoothie with fruits, nuts, seeds, or a drizzle of syrup for an added visual and flavor boost.
- Serving: Serve the layered smoothie immediately to enjoy the full effect of the layers.
Artistic Expression
- Creativity: The art of layering smoothies is an opportunity to express creativity in choosing colors and flavors.
- Visual Appeal: The visual appeal of layered smoothies makes them particularly enticing, especially for special occasions or to impress guests.
Mastering the art of smoothie layering can take practice, especially to get the consistency right for distinct layers. But the end result is often worth the effort, creating a drink that’s as delightful to look at as it is to drink.
The Layering Process
Layering a smoothie is a creative way to make your drink visually appealing by separating different colored blends into distinct layers. Here’s a brief guide on how to layer a smoothie:
Choose Different Colors: Select smoothie ingredients that have contrasting colors. Common choices include berries for red/purple, mango or peach for yellow, spinach or kale for green, and banana or yogurt for white.
It is also acceptable to keep colors and flavors within a common spectrum enjoying the different shades of color as opposed to high contrast layers.
Prepare Separate Batches: Blend each colored ingredient separately to create individual smoothie mixtures. Each blend should have a slightly thicker consistency to prevent the layers from mixing too easily. You can achieve this by using less liquid or adding ingredients like banana, yogurt, or avocado.
Chill Each Layer (Optional): To make the layering easier, you can chill each blended mixture in the refrigerator for a few minutes. This step helps to maintain the distinct layers.
Carefully Layer the Smoothie: Start with the heaviest or densest smoothie mixture as the first layer. Gently pour or spoon it into the glass. Slowly add the next layer on top. Using the back of a spoon or a small cup can help to gently layer the smoothie without disturbing the layer below.
Repeat for Each Layer: Continue this process with each smoothie mixture, arranging the colors in the order you prefer.
Garnish and Serve: Once you’ve layered all your smoothies, you can garnish the top with fruits, nuts, seeds, or a drizzle of syrup for an added visual effect. Serve with a wide straw or a spoon.
Layering smoothies might take a bit of practice to get the perfect density and technique, but it’s a fun way to make your smoothie extra special!


The Physics of Layering
Distinct separation
If you want to maintain distinct separation between layers you will need to have similar bases. A layer of Greek yogurt will balance an additional layer of the same Greek yogurt. The fats, water content, and temperature of each layer must be as close as possible to one another. This will reduce border blending between the layers.
Blending of layers
If you want to have the layers blend and not be very distinct, then use temperature and viscosity to cause blending. Some Smoothist’s will create a transition layer above one layer and before the next layer. It sits between two distinct layers and because it is warmer and more watery in texture, it will naturally blend with the layer above and below. The color of the transition layer is a blend of both the bottom and top layer. As the transition layer warms the division between the layers will blur and the colors will blend towards one another.
This takes a bit of practice, but the results can be quite impressive.